You spot it—a silent pounce of a snow leopard or the breath of a lion visible in the morning mist. But when you tap the shutter, the moment is gone or poorly captured. Wildlife photography is a thrilling combination of patience, precision, and the right tools. Yet many beginners and even experienced photographers fail to fully harness the potential of their gear. What makes a professional-grade camera setup for wildlife photography truly powerful? In this post, we’ll walk you through essential gear, optimal settings, smart lens choices, and software solutions that elevate your shots and make managing thousands of photos effortless. Prepare to transform your wildlife photography into an efficient, breathtaking art form one frame at a time.
Essential Gear for Capturing Wildlife Shots
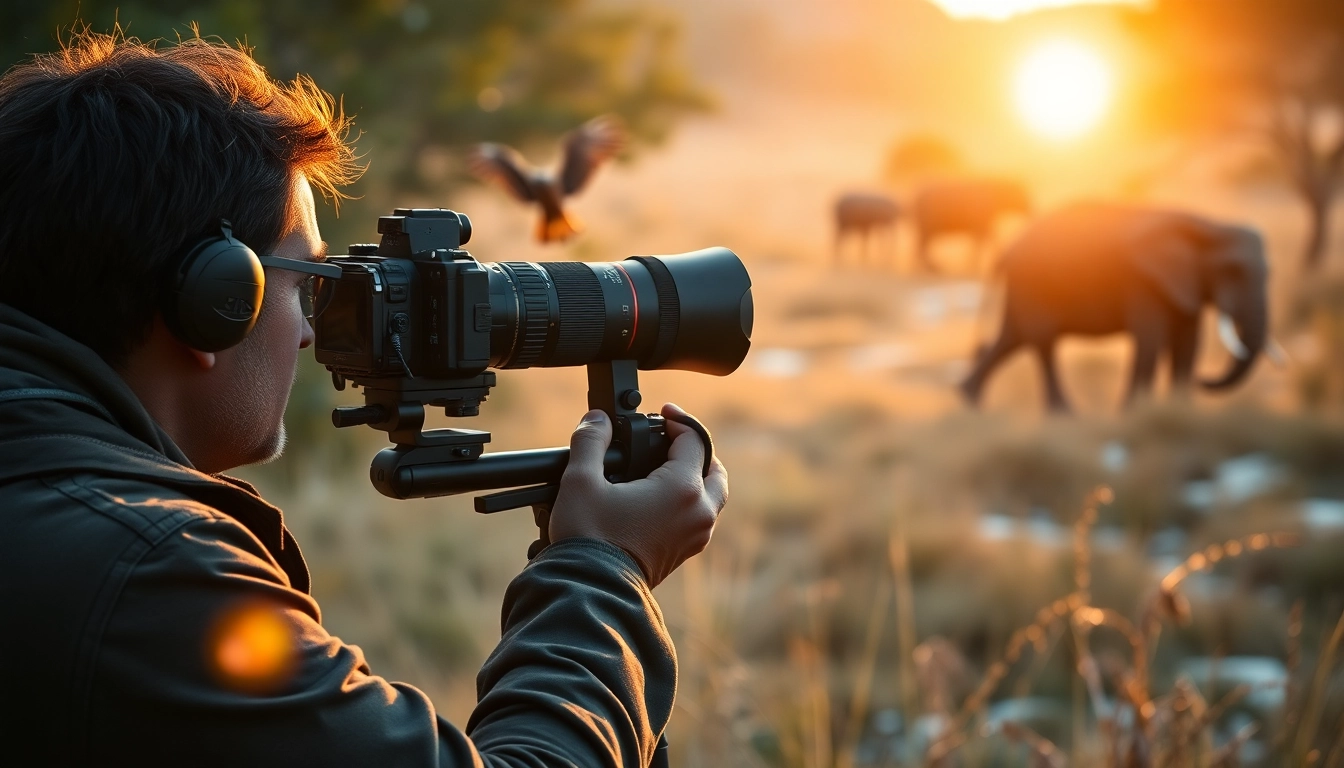
Understanding the Need for a Robust Camera Setup
Wildlife photography takes you into unpredictable environments—dense forests, vast plains, or freezing tundras. Wildlife photographers face fast movements, long distances, and often low-light conditions. Without the right gear, even a well-composed shot can fall short in clarity or timing.
Core Components of a Wildlife Camera Setup
A powerful camera setup for wildlife photography includes the following essentials:
- DSLR or Mirrorless Camera with Fast Autofocus: Cameras like the Canon R5, Nikon Z9, or Sony A1 offer high FPS (frames per second), critical for capturing fleeting animals.
- High-Speed Memory Cards: Wildlife action happens quickly. Use UHS-II or CFexpress cards to ensure your camera processes burst shots rapidly without lag.
- Sturdy Tripod or Monopod: Movement isn’t always welcome. For long exposures or lens stabilization, reliable tripods like the Gitzo Mountaineer or Manfrotto monopods are key, especially with heavy lenses.
- Weather Protection Gear: Rain sleeves, lens hoods, or even full camera armor shields against rain, dust, and harsh climates.
- Telephoto or Super Telephoto Lenses: We’ll dig into this in Section 3, but be sure your setup allows room for lens flexibility.
Optional—but Valuable—Add-ons
- Gimbal Heads: For fluid tracking of animals during motion.
- External Battery Pack or Solar Charger: In remote locations, lasting power is vital.
- Camouflage Covers or Blinds: Disguise both photographer and gear.
Bringing It All Together
The most effective camera setup for wildlife photography balances speed, durability, and flexibility. While it may involve upfront investment, the rewards are profound: clearer shots, better timing, and far less frustration in the field. Your gear becomes an extension of your instincts, capturing moments that otherwise vanish with a blink.
How to Optimize Camera Settings in the Wild
Why Settings Matter More Than You Think
You’ve invested in the right camera, but without fine-tuned settings, even the best gear won’t deliver stunning wildlife images. Lighting changes by the minute, and motion rarely follows predictable rhythms. Mastering your camera settings is just as important as the gear itself for any camera setup for wildlife photography.
Key Camera Settings to Master
Here are the most crucial settings and how to use them effectively in the wild:
- Shutter Speed: Set a fast shutter speed (1/1000s or faster) for birds in flight and sprinting animals. Slower speeds (1/250s) are better suited for still moments or low light but require a tripod.
- Aperture Priority Mode (A/Av): Ideal for controlling depth of field. Use a wide aperture (f/2.8–f/5.6) to keep animals sharp and separate them from messy backgrounds.
- ISO Sensitivity: Keep ISO below 1600 for cleaner images, but don’t be afraid to push it higher if action demands it. Cameras like the Sony A1 or Canon R5 handle noise well.
- Autofocus Tracking (AI Servo/AF-C): Set autofocus to track moving subjects continuously. Combine this with subject-detection modes for best results.
- Continuous/Burst Shooting: Enable high-speed burst (10–30 fps). One split-second capture can define a series.
- White Balance: Use Auto in rapidly changing conditions, or custom set to get natural tones in golden hour light.
Custom Shooting Modes & Back Button Focus
Create custom preset modes for quick switching. A user-defined mode for action, another for portraits, and one for dusk lighting saves critical seconds. Also, assign focus to the back button for more control without interfering with your shutter.
Summary
For a dynamic camera setup for wildlife photography, configuring your settings wisely is just as important as lens or sensor choice. Pre-define modes, use burst shooting, and learn to adapt ISO and aperture on the fly. Great wildlife moments are rare, but with the right settings, you’ll be ready every time one crosses your lens.

Picking the Right Lenses for Wildlife Scenes
The Power of the Lens Makes the Frame
Many photographers ask: “Which lens is best for wildlife?” The answer depends on your location, subject, and shooting style. Your lens dramatically impacts not just zoom, but image clarity, background bokeh, and flexibility. No camera setup for wildlife photography is complete without lens strategy.
Top Lens Types for Wildlife Photography
- Telephoto Zoom Lenses (100–400mm, 150–600mm): These provide versatility for framing moving animals at different distances. Popular models include the Sigma 150–600mm and Canon RF 100–500mm.
- Prime Super Telephoto Lenses (400mm, 500mm, 600mm, 800mm): Deliver stunning detail and sharpness. However, they are heavier and often require a tripod or gimbal.
- Wide-Angle Lenses (16–35mm, 24–70mm): Not just for landscapes—wide angles work great when animals are nearby or when storytelling includes environment context.
Consider Aperture and Weight
A lens with a fixed wide aperture (f/2.8 or f/4) excels in low light, ideal during dawn or dusk. But they’re expensive and heavier, meaning trade-offs with portability. A solid compromise is variable aperture zooms like 100–400mm f/4.5–5.6.
Lens Features that Matter
- Vibration Reduction/Image Stabilization: Crucial when handholding or using slower shutter speeds.
- Weather Sealing: Look for lenses that can handle moisture, dust, and temperature swings.
- Teleconverters: Boost reach without changing lenses. A 1.4x or 2x extender is handy, though it may reduce aperture.
Summary
Investing in the right lens is perhaps the most important decision in configuring a camera setup for wildlife photography. Whether you need flexibility, reach, or low-light capability, there’s a lens tailored to the task. Don’t treat lenses as accessories—they’re the instrument through which you interpret nature’s drama.
Using SaaS Tools to Automate Photo Management
The Photo Overflow Problem
After each shoot, you might come back with hundreds, even thousands of RAW images. Sifting, naming, tagging, and storing these photos becomes a tedious administrative task. Left unchecked, it clutters hard drives, stalls your editing process, and undermines the efficiency of your camera setup for wildlife photography.
Why SaaS is a Game Changer
Cloud-based tools offer intelligent photo management and automation no desktop system can match. Software-as-a-Service (SaaS) platforms make it easier to turn chaos into order—fast.
Top SaaS Tools for Wildlife Photographers
- Adobe Lightroom Cloud + Creative Cloud Storage: Automatically syncs, backs up, and lets you edit from any device.
- Photo Mechanic + Dropbox Smart Sync: Sort and cull images at lightning speed before final editing.
- Peakto, Excire Search, or Adobe Sensei: Smart AI tagging, face/animal recognition, and searchable databases let you find that eagle shot from last year within seconds.
- Cyberduck + Amazon S3 or Backblaze: Affordable cloud storage for archiving full-resolution images.
- SmugMug, Zenfolio, or Pic-Time: For portfolio hosting, client deliveries, or passive sales directly from shoots.
Automate Your Workflow
- Use Zapier to connect Lightroom exports to cloud storage and image backup platforms.
- Set up automatic imports from SD cards into Lightroom with smart keywords and location tags based on GPS data.
- Share selected photos directly with collaborators or sponsors using auto-generated links.
Summary
Using SaaS platforms elevates not just how you shoot but how you deliver your work. Part of a strong camera setup for wildlife photography is creating an ecosystem where images are organized, searchable, and ready for publication without delay. In an era defined by speed and scale, these tools are not optional—they’re essential.
Post-Production Tips to Elevate Wildlife Images
Why Editing is the Final Creative Touch
Even the best shot straight from the camera doesn’t represent your full vision until it’s edited properly. Post-production enhances color, clarity, and emotion—helping your wildlife photos come alive. Think of it as the last mile in your camera setup for wildlife photography.
Start with RAW
Always shoot in RAW format. It retains more data and gives you flexibility in highlights, shadows, and white balance corrections.
Recommended Editing Tools
- Lightroom Classic: Great for organizing and batch processing your wildlife shots.
- Photoshop: Ideal for detailed retouching, background cleaning, or exposure blending.
- Topaz DeNoise AI & Sharpen AI: Clean up photos taken in low light or fast action scenes with incredible accuracy.
Key Editing Steps
- Crop Carefully: Maintain the rule of thirds or golden ratio to lead the viewer’s eye to the subject.
- Adjust Highlights & Shadows: Bring out texture in fur, feathers, or eyes without flattening the contrast.
- Color Grading: Adjust temperature or tint to bring warmth to golden-hour images or cool tones to arctic scenes.
- Noise Reduction & Sharpening: Essential for images taken at high ISO in dusk/dawn or in motion.
Export Like a Pro
Export in multiple formats:
- High-res TIFF or PNG for printing
- Compressed JPEGs for web or portfolio sharing
- Social media optimized versions resized with watermarks
Summary
Post-production doesn’t hide flaws—it reveals your photographic intent. With a compelling camera setup for wildlife photography and thoughtful editing, you can turn raw scenes into fine art. Don’t rush this stage; it defines how your work is perceived and remembered.
Conclusion
Wildlife photography demands more than timing—it calls for total preparedness. From selecting the right camera body and configuring dynamic settings, to choosing lenses that match your vision and streamlining your workflow with SaaS tools, every piece contributes to a successful shoot. And in post-production, your vision truly comes to life. A robust and thoughtful camera setup for wildlife photography isn’t just about better pictures—it’s about honoring the fleeting moments nature offers you.
Let this guide be not just a blueprint, but a springboard. Build your setup, fine-tune your process, and go capture the stories of the wild—one breathtaking image at a time.
Set up your ideal wildlife camera system and never miss the shot again.
Start Free
– As an Amazon Associate I earn from qualifying purchases.
Explore more on this topic